Showing posts with label product review. Show all posts

Guest Blog Post – Pro-tec Towing Jacket

Hi everyone. I am delighted to present another guest blog post. Caravanning pal Barry has a first look at the new innovative Towing Jacket from Bradford based company Pro-tec:

There are many things that I love about caravanning - too many to mention at this juncture and most have been covered in various Vlogs, Blogs & other media outlets anyway so I won't waste your time listing them now.
What I am going to write about is a couple of things l don't like. The first one is cleaning the outside of the caravan.
I take care of the interior of my caravan, an Elddis Avante 550 more than I do my home. I instantly wash up after we have eaten, I dust and vacuum daily, in fact I have made a rod for my own back because my other half expects me to have the same enthusiasm for domestic chores at home now but we won't go into that. Anyhow, I digress, it's the exterior of our beloved 'van that causes some consternation.
Don't get me wrong, I love it to be a dazzling example to other people on the road, I am very proud of my caravan, but cleaning it is so frustrating. You can spend a couple of hours washing, rinsing and waxing it before your short weekend break but if the conditions are against you by the time you arrive at your chosen destination it can look like this.

protec01

Thank you Nigel Hutson for allowing me to show the worst our roads can do to our home from homes.
The weather this last week is a prime example, the Beast from the East conspired with Storm Emma to conjure up a torrid time for the nation. Many parts of the country were cut off for a short while and lot's of commuters were trapped on the Motorways and Highways for many hours.

Fortunately the Beast & Emma have absconded but left us with some very messy roads, roads that will cause havoc with your recently cleaned vehicle.
If you are like me you will have given your caravan a clean down before embarking on your latest outing, however, with the recent weather your pride and joy could end up looking like poor Nigel's unit following a trip to York.
So, the question is how do we avoid this and the answer is a towing cover. That brings me to the second thing I have not liked so far in my caravanning journey so to speak. This little addition to your caravanning kit can not only protect your 'van from the perils of a dirty road or muddy campsite but it also has the added advantage of protecting the windows from stones and other debris thrown up from the ground.
So, I set out to purchase one and being a typical Yorkshireman looking for a bargain I bought a second hand one that was a few years old but still served it's purpose. However, putting it on the caravan was a right royal pain in the neck. I had to insert about twelve separate ties in each awning rail then fold the cover up from the bottom and tension each tie separately, something that really needed two people and was time consuming, so as you might imagine, after a short while I stopped using it and we were back to square one, until now......
Let me introduce you to the Brand New Pro-tec Towing Jacket. The Towing Jacket was presented to the caravanning world at the recent Caravan and Motorhome show at the NEC and by all accounts it has been received well by the community.

protec02

So, what is different? Well, firstly, it is a one person operation, it is unbelievably easy to attach to your caravan. The cover is in two parts, unsurprisingly a left and a right side. Slide the left side into the left awning channel.

protec03

Then the right side of the jacket into the right awning rail. You can do it the other way around if you so desire, we are very easy going us Yorkshire folk!

protec04

Once both sides are inserted into their appropriate rail, simply zip the two sides together and there you have it. Well almost, there are two hooks on each side of the jacket that you attach to the fascia of your caravan and a strap that you pass under the A-Frame to secure it. And that is literally that. It will take you two minutes, probably less with practice. It's so simple, let's face it,it has to be for people like me:

protec05

But that's not all. With most other towing covers, once it is on you can't get to the front locker box, not easily anyway, so fingers crossed you haven't absentmindedly forgot anything important like your towing mirrors in there. Ahem. However, with the Pro-tec jacket you don't need to worry about that because guess what? You can just pull the zip up and get access to the locker.

protec06

The jacket has two toggles at the top of each corner allowing you to fasten the cover so it doesn't impede you when you are doing what it is you are doing in the locker.
It doesn't end there. There may be some reason that during your journey you need to stop, maybe you are on a tour on the continent, France maybe and you stop in an Aire possibly and want a coffee or meal in your caravan. Do you take off the cover or put up with it obscuring any view, the chances are with all the shenanigans of putting it on you won't want to take it off. Well, with the Pro-tec Towing Jacket you don't have to.

protec07

All that is required is to pull down the zip from the top down to the desired level and you have a view again. The zips are kept in place with a Velcro cover, obviously I have not put these to the test yet, that observation will come later this month.
As you may have spotted there are a couple of other benefits to the towing jacket I haven't yet mentioned. On the photo above you can see at the bottom left and bottom right of the cover are two inlets that allow your lights to be seen, don't worry, they have a soft plastic cover so no chance of the dirt getting in there.
Also you may have noticed the two pockets on either side of the cover about half way up, the more astute will have gathered that these allow you access to the handles.

protec08protec09

So to summarise my first impressions:
The Towing Jacket is lightweight and packs up into a neat little bag, handy for storage.
It is available in blue (like mine) or green, I have to be honest, I am not sure if they are available in other colours. The wife preferred blue because our colour scheme in the van is blue!
For me the main benefit is that it can be fitted quickly and is a one person task. That minute or two needed to fit it can save you time ( not having to clean the van as often) and money ( preventing damage to windows or body from stones etc).
Access to handles, windows or the locker is no issue.
So, we now have to put it to the road test, which, as I have mentioned I will be doing in a couple of weeks.
So far though, the Pro-tec Towing Jacket has ticked all the boxes and I haven't found any negatives yet (which has surprised my wife).
If you have got this far, thank you for reading this blog, it is appreciated and if anyone does have any questions they want to ask me regarding the jacket, I am on twitter @tyke34.


Happy Caravanning.

Barry

Check out the Pro-tec Towing Jacket HERE

Guest Blog Post – My Mellow Mattress Review

Hi everyone, I am delighted to present a first for Legs Down – our first ever guest blogger. Here, friend and fellow caravanner David takes a look at a custom mattress designed for him by My Mellow – the same company that made our toppers, a review of which you can read HERE:

My Mellow Mattress by David BellIMG_6884

So I thought I’d go about finding our caravan (@ElvisTheElddis) a new mattress for the fixed bed… Having had “Elvis II” for over a year now, and over 10 trips away in him, I thought it was time to invest in a new mattress. The existing one was very badly dipped at one side, where the previous owners had used it and I was finding it felt a bit odd to sleep on. ‘Elvis’ is a 2003 Elddis 534 ‘Knightsbridge SE’ – and so the 13 year old mattress has seen better days.

Now I think I seem to be a bit of a “princess and the pea” when it comes to mattresses, and mine has to totally flat with no dips, bumps or lumps. I’m equally ‘quirky’, shall we say, about how level the caravan is, and have been known, just before bed, to dash out and re-adjust the jockey wheel and steadies if something doesn’t feel right… The other half, however, doesn’t seem to care and has the ability to sleep on a dime as they say, whereas I’m really fussy, and the so the dip at my side was starting to do my head in.

Now being a ‘frugal’ Yorkshireman, I tried my best to rectify the dip with various methods, and had even managed to get hold of a lovely, expensive memory foam mattress topper from a fellow caravanner, who gave it to us free of charge (what a star!) after it no longer fitted his new van. I cannot dispute how much comfier the mattress was with the new topper, but the dip was still there, I could still feel the dip, the topper just made it a comfier dip…. To try and rectify things I’d even resorted to placing ‘awning foam mats’ under my side of the bed, of various depths and in strategic locations in a vain attempt to try minimise the dip. It sort of worked, but was far from ideal…

So, the hunt began for a new mattress.

I searched various forums for reviews, had a nosey through my various caravan magazines for adverts (I get FOUR through the post every month!) I also had a nosey around Facebook groups and Twitter. There seemed to be plenty of people with toppers, raving about them, but not a lot out there with people having replaced their entire mattress.

I then stumbled upon a mattress topper review on the Legs Down blog (where this blog post is now being very kindly hosted) by a company called “MyMellow”. Now knowing Richard and Trevor, and seeing their previous frank reviews, I knew if they said they liked something, it ought to be pretty good. They’ve been caravanning for a good few years now, and both working at a college get decent chunk of holiday leave, of which they spend as much of that leave as they can caravanning, so compared to most they’ve spend hundreds of nights caravanning. They said they’d got these new toppers and they transformed their beds, and suggested I take a look at MyMellow for my mattress, as they knew they also made custom shaped mattresses too.

So, I headed over to the MyMellow website to take a look around. The site allows you to choose the basic shape of the mattress you need (standard, curved, cut off etc.) and then you just need four measurements (for a cut off corner bed like mine) and your choice of mattress overall depth.

You then get to choose how firm you want the mattress to be (not seen this on many other sites). The best part is you can click calculate at this point, before having to enter a load of personal information - so you can get an idea of cost beforehand. Nice.

The site is really well designed and, key for me, it worked really well on my iPhone too. As a web designer for a living, I get really frustrated with websites that don’t load correctly on my phone!

Now my original mattress in Elvis had a seam that ran top to bottom, a sort of hinge, allowing the mattress to fold in to two halves, and fold up easily as the bed frame lifts up, giving easier access to the under bed storage area. Some may not see this as an issue, or may not need the split, but I have to dive head first under the bed on each trip like some gurning geriatric gymnast in order to; 1) flick the water drain switch on the water heater, and 2) get the Wastemaster out, as that’s where it lives.

The MyMellow website didn’t have a section where I could request this though, so I got in touch via Twitter to ask if it was possible for them to make a mattress in this layout. Thankfully I got a quick response to my questions from Martin, via a friendly Direct Message, saying yes it was possible to make the mattress in this way, with a zip and in two sections – and for a small extra fee of just £30!! A certain other manufacturer, who I’ll not mention, wanted an extra £100 more to put a split in their mattress! Martin then also said they have a section on their site where you can upload a drawing of your own mattress, so that they can quote based on very specific requirements. Good.

I like a company that’s quick to respond on social media, and as I tend to spend most of my waking hours on either Facebook or Twitter, and so a quick reply from MyMellow was another big tick for me!

So was this a decision made? The price was right, they could make the mattress in the shape I wanted, they’re quick to reply on social media, their toppers got good reviews…what else was there?

Do I click the green purchase button…!?

I’m one of these people that ends up searching and searching before committing to something, to ensure what I get is just right, and after much hunting, and various quotes from various manufacturers (varying WILDLY I have to say!) could I actually commit to buying from MyMellow?

My finger hovered over the button… I thought I’d best do some digging first.

I thought to myself “just who are MyMellow? They may not have the experience of one of the more established brands” and “why risk something from a company that seemed to me to be a relative newcomer in the caravan mattress industry…?”

Or so I thought…!

Well, that’s the thing, a quick delve into Google revealed that MyMellow are a new brand created by parent company ‘J and A Foam’, who have actually been making mattresses, toppers and truck mattresses for over 40 years! I’d say that’s enough experience for me… It seems the MyMellow brand is a new and exclusive brand of mattresses and toppers created especially for the leisure vehicle industry, but also available to buy for home too.

Right, that was it, the decision was made! A long running family company, based up north, made in England, many years’ experience, swift delivery, and a good warranty, the mattress order was placed, and in time for my next trip away to TwitterCamp

I sent over my mattress dimensions to MyMellow, showing exactly where the fold needed to be, the length/width and depth and the firmness I wanted. I just had to wait for it to be custom made and then sent out via tracked courier.

IMG_6891A few days later the mattress arrived, and all bundled in to a sort of huge body shaped cardboard tube! OK it was heavy, but I could just about lift it, and I even managed to get it in to my car (a convertible Audi!) to take it home from my parents’ house, where it had been delivered.

Knowing that mattresses such as this, when they’ve been compressed for transport, need time to expand, I thought it best I brought my caravan home so that the new mattress could be put in place, and exchanged for the old one, allowing it to fully form its final shape. I was itching to try it out, but thought it best I wait and allow it to expand properly. One thing I forgot to mention, was the two free pillows that also come with the mattress, these also popped up and started growing as I opened up the packaging.

Oh and one other added bonus, no odd smell, as I know some foam mattresses can whiff a bit when new.

So a day later, it was time. The low autumn sun was streaming in through the window, perfect mattress testing conditions! I grabbed one of the free pillows and sat on the edge of the bed… Ooo… I shuffled back, threw down the pillow and laid down. Oooooooooooooh comfy!!! If I’d have had the time I’d have happily taken a power nap there and then. But I couldn’t, I had to take Elvis back to storage again, but I couldn’t wait to spend the night on it.IMG_7142

Things were looking good, the mattress felt great – firm but not so much so that it was uncomfortable, I like a firm mattress, but this seemed to almost mould itself to my shape. I rolled over on to my front, and noticed that there’s an odd short time as the mattress seems to re-contour itself to your shape. I’m one of these odd people that most of the time sleeps on my front, don’t ask me why, but I tend to spend a good while shuffling about till I get to feel just right. Front, side, back, side, and back again to being on my front again. Arm under pillow, arms by my side, shuffle shuffle shuffle. Drives my other half potty! This sort of foam mattress reshaping is something new to me, as my mattress at home is a very expensive Dunlopillo latex one that doesn’t react in this same way. I’ll get used to it I’m sure…

So I took the caravan back to storage, taking note that there wasn’t much alteration in nose weight (something to bear in mind, as the replacement mattress could be heavier OR lighter than your previous one) ready for my first trip away and my first test of the new mattress. Exciting.

A few days later it was time to go away on my first trip with the new mattress. I headed from Leeds down to Birmingham and with Elvis safely locked up and secure in the car park, I spent the day pounding the halls of the NEC Motorhome and Caravan show. In and out of caravans, awnings, motorhomes for six hours! Once back to the car park I then had to drive for half an hour before I pitched up at Kingsbury Water Park Camping and Caravan Club site. A quick pizza was scoffed before settling down with a bottled beer and the telly IN BED of course.

The mattress seemed equally as comfortable for early evening lounging as it did in my previous short test. It wasn’t long before it was time to retire. And after walking miles and a long 3 hour drive to Birmingham, I was ready for bed. As I’ve said previously I’m normally a shuffler in bed, before I get comfy, but this time I settled fairly swiftly into position and drifted off. No doubt dreaming of all those shiny new caravans that I couldn’t afford…

IMG_6916Now it’s not unusual for me to wake during the night when I’m away in the caravan, most often to use the loo, and this night was no exception. I did wake to the rain hammering on the roof of the ‘van. I was nice and cosy though, didn’t need the loo, and wasn’t too warm either (a concern of some foam mattresses, but wasn’t the case thankfully). So I quickly drifted back off to sleep again.

The next few days I spent down with friends at TwitterCamp in Devizes, and spent four more nights on the new mattress. I have to say I’m really pleased with it. I can often experience lower back pain when caravanning, usually associated with stretching wrongly, or when tightening jockey wheel clamp, and this trip was no exception, but I have to admit the mattress did seem to help and the pain seemed to get better quicker than it normally would. Not sure of the mattresses orthopaedic qualities but it’s certainly very comfy, the outer quilting is designed to dissipate heat too while providing a removable washable layer of protection too.

All in all, I’d give the new mattress a good 7 out of 10. Why not 10? Well the memory foam sort of re-shaping itself to your contours takes some getting used to, and if you sleep in the same position you may never notice this, but being a shuffle-bum like me, I did. I guess this may improve over time as the mattress is still very new and may still be relaxing a bit.

One final passing comment;

If I were to order again, knowing what I know and having slept on the new mattress, I may reconsider having the split / fold design. The seam is hidden, and if you go away as a couple you may never notice that the seam is there as you’d tend to stay on your own ‘section’ of the bed, however, as I holiday solo at times, and tend to end up laying diagonally in the bed at some stage during the night, I did notice a slight difference in feel underneath me. Not so much as it was uncomfortable, but I could tell the seam was there (did you read the bit about me being a bit princess and the pea…). So unless you absolutely have to have the seam/fold, or could live without it, then I’d order it as a single piece. Just my tip.IMG_E7172

SO, if you’re considering a new mattress, be it for home, or for your caravan, motorhome, barge, truck, whatever, you’d be daft not to consider the team at MyMellow. As a bonus, I’ve been given a 10% discount code for anyone wishing to buy, just order on their website and use “nut10” without the quote marks, and this will give you 10% off your order!

David Bell
AKA @CaravanNut and @ElvisTheElddis

Product Review – Nextbase 412GW Dashcam

Insurance - in whatever form - is something we hope we’ll never need to use. The same could be said of a dashcam. Recording - hopefully - nothing of note save perhaps for a memorable incident to be posted on social media!
Our dashcam however gets a little more use. Many who follow my blog and social media channels will come across our Site Arrival videos - dashcam footage of the last few miles or so to to a campsite overlaid with a bit of commentary from yours truly.
DSC_0002This summer the good folk at Nextbase kindly sent me one of their best selling models to review - the 412GW - so how did we get on and how did it compare to our previous device?DSC_0001
Installation was swift and straightforward - positioning and securing the suction mount then running the power lead back to the socket. In fact it was even easier than that as I used the power lead from the old dashcam after establishing that the connector and power supply output was the same.
The mount incorporates the GPS module and choosing whether to have the coordinates recorded on screen is one of many option available but the only thing you really need to do is insert a MicroSD card, set the time and date and you're good to go. An excellent quick start guide is included that covers the basics.
DSC_0010Operation was similar to our old device. It starts recording when you start the engine and stops when same. Recordings are made in 5 minute clips. Once the memory card is full, the dashcam overwrites starting from the oldest clip – this is why it’s important that the time and date it correct, particularly for how we will be using the footage.
Of course the hope is that in normal use you will never need to download the footage to pass on say to an insurance company, or even the police. However, we need regular access to the clips though to create our Site Arrival videos and that is where this product excels.DSC_0004
Transfer of files to your phone  is easy using the inbuilt WiFi feature together with the Cam Viewer app available for iOS and Android. Footage could then be easily emailed to say an insurance company without the bother of transferring to a computer. What it means to us is that we can transfer footage ready for editing without having to physically remove the dashcam – saving wear and tear on the mount or memory card.
Should you wish to transfer footage to a computer however, the Nextbase Replay 2 software is included. Files can be played back on most video playing software but with this not only can you view the footage but also a map of the route taken, speed, direction and any G sensor information too. All useful information in the event of an insurance claim.
nb01
We’ve now had the dashcam a couple of months and it’s already proving to be a worthy replacement for our old dashcam. The picture quality is excellent – recording at 1440p – and the wireless transfer facility is particularly handy for us too. It seems well made and I’m sure it will give us many years of service. I’d have no hesitation in recommending it to anyone in the market for one.
For more information go to www.nextbase.co.uk
To buy from Amazon go HERE


Product Review - My Mellow Mattress Toppers

Ok, I know it's not the done thing to talk about a woman's age, but our Patsy is getting on a bit. And before we go any further I should explain to any newcomers to the blog that Patsy is our caravan, though to be fair in most respects she is wearing pretty well. One area that has seen better days though is the two front bench seats. Ok during the day as sofas but at night when their duties continue as beds they're definitely showing their age: spongy and generally less supportive than is ideal. Particularly when the human back they’re supporting is past it’s prime too…

More than once we've considered toppers of some sort but always put it off, not least because yours truly hates parting with cash for anything unless it's for something important. Like beer - sorry, materials for my 'research' project. Or another long leather coat....

Step forward then a company called My Mellow who contacted us through Twitter and sent us a pair of toppers to try out.

Last weekend, in a rare mid school term outing for Patsy we were able to try them out for the first time. So, how did it go? Well. Very well in fact. Although to be fair the first night didn’t provide the sternest test. If I say end of a long tiring week and pub you get the idea. I probably would have slept just as soundly on a slab of concrete, however lying there with an early morning cuppa it was noticeable how much more comfortable the bed was. Ditto Saturday and Sunday night, which being a ‘school night’ there was very little liquid, er influence. I’m very much looking forward to using them on one of our longer trips when I think their effectiveness will become even more apparent.

DSC_0002DSC_0005DSC_0003

So, they work although as I mentioned earlier we’ve not tried similar products from the other better known companies in the caravan and motorhome market so this review is not comparing like for like. I was very impressed though and once again wished we’d taken the plunge earlier.

Okay, a bit more about the toppers themselves and then a look at the company that makes them.

DSC_0001Our toppers were 190cm x 72cm each with a thickness of 5cm. They would sell at £105.06 each - all prices include delivery. From order to door was a couple of days in our case but delivery is usually within 5 working days. They were delivered vacuum packed and we followed the enclosed instructions to lay them out and let them ‘breathe’ and open fully. Inside is memory foam with a density of 120kg/cubic metre. The cover is zipped and removable for machine washing. The photo shows the topper secured with a ‘thingymebob’ - these are not included but you can find out more about how to make them with Dan Trudgian’s excellent video HERE.

My Mellow are a family run company based in Blackburn, Lancashire and have for many years supplied foam to the furniture and bedding industry but are now entering the caravan and motorhome market.

As well as toppers they make full mattresses too and offer a made to measure service through their easy to use website which shows a selection of popular shapes to aid selection, and if the toppers are anything to go by, mellow01they’ll be a worthwhile investment. The website will calculate the cost based on requirements there and then - you don’t have to wait for a quote - and the price you see is what you pay. As I mentioned before, delivery is included. All are made in house  from scratch, not by third parties and because of this they are able to offer keener pricing than more established competitors. I’m sure you will want to check for yourself but to look at just one example - the nearest equivalent to our toppers would cost around forty pounds each more - and there would still be a delivery fee on top. A free pillow is sent with every topper too.

The foam used is made in Manchester and fully compliant with British fire safety standards BS7177 and source 5 - a safety standard equivalent to that used by hotels etc.

There is a short video showing demonstrating our toppers on our YouTube channel which you can find HERE.

The good folk at My Mellow have also given us a discount code - use code legsdown at the checkout to get a further 10% off until the end of September.

To sum up - we’re VERY happy with our toppers and I really like the fact that they are made in Britain too and I think My Mellow will prove to be a serious competitor in their new market.

You can follow them and keep up to date on the usual social media platforms - Twitter & Facebook.

4984e6_3a410fba76924b02bc763cf342250f05~mv2


Solwise - More WiFi options.

Many of you have read my review of the Solwise WiFi Booster Kit back in April. In fact given Trev the  Portly Partners’ enthusiastic activity on social media I would be surprised if you missed it! It’s been one of most popular reviews and a most useful bit of kit too. I wish I’d bought one ages ago instead of waiting for the opportunity to review one. It’s already saved us plenty in WiFi costs and I expect that will continue throughout the summer.

Talking of the summer I am excited to have the chance to evaluate two more products from Solwise, both of which are designed to pick up even weaker signals than even the impressive kit we reviewed. They do the same thing but what they can do it with differs, so lets take a look.

First up is the Outdoor USB Panel Antenna

DB-86WUUMAAAnSBThis connects to your computer or suitable router via USB like the Patriot that was in the kit we reviewed. A driver and utility disk is included but this won’t be needed if it’s paired directly with the Solwise router. Two jubilee clips are included for mounting on a suitable mast but I’m thinking that stout cable ties might be as effective. I have already bought his Vision Plus mast to give more height to our existing kit and the antenna should fix to that just fine.

This is a directional antenna so to perform to it’s potential it needs to be aligned correctly. Rotating the unit on the mast with semi-tight cable ties may be the way to go and I’m looking at ways to make alignment easier and avoid the sort of faffing associated  trying to align a satellite dish manually for example. I’m sure many have seen that carry on on site!

I’ve already had a play with this at home and whilst the environment is completely different to it’s intended use the results gave a clear indication of it’s potential once on site. First though I’ll explain my set up at home to put the results in to context.

My router – a BT Hub Version 4 - sits in the lounge of our flat and in the same room Speedtest.net reports speeds of anything up to 72 Mbps download through Wi-Fi. 

My laptop is situated in the ‘office’ also known as the dining room, spare room, Legs Down HQ and caravan paraphernalia storage area! It's two rooms down along the hall from the lounge and there I can expect around 8-12 Mbps download. Nothing like the speeds several walls and a few metres away in the lounge but still something many could only dream of!

With the antenna connected via USB and driver installed results were certainly interesting. Having the antenna laying flat on it’s back on the floor made little difference to download speed. However, positioning the unit upright and directing in roughly towards the BT router speeds improved to 28 Mbps. Up to three times faster than without. Three  minor adjustments to the antennas direction brought speeds progressively up to 32 Mbps – and this was still through several brick walls.

Now, as I said this in no way simulating it’s intended use but it does show two things – it’s potential power in picking up weak signals and the importance of correct alignment to achieve the best results. I’m very much looking forward to trying this out on site and paired with the Solwise router that we already have as part of the kit reviewed in April.

In addition we will also be looking at the Outdoor Panel Antenna.

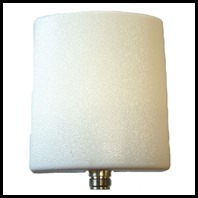
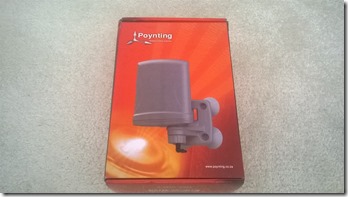
net-wl-ant010pn-1WP_20170331_13_03_34_ProThis has an N-type connector and a bracket at the rear for wall mounting if you wish. For those of us that already have the kit that I reviewed however, this can directly replace the omnidirectional unit included in that kit – shown here in action.

Again, this device though is directional – so to work correctly and pick up weaker signals it needs to be aligned accurately. And again, I will be looking at ways to make this easier.

We will be having a thorough look at both devices throughout the summer with a written and hopefully video review to follow.

For those of you that have read enough and are already interested, the USB Panel Antenna is available for a little over £40 HERE. If you have the Patriot Wi-Fi Booster Kit then the Outdoor Panel Antenna is an excellent value upgrade at a little over £20 and you can see that HERE.

My review of the Patriot Wi-Fi Booster Kit can be found HERE and the accompanying video HERE

Solwise Mobile Internet Solution

Following on from our review of the excellent Wi-Fi booster system from Solwise, we were given the opportunity to evaluate some more tech – this time to get you connected via mobile networks when Wi-Fi isn’t available.
It’s high end – and not cheap - and we agreed that it would be of limited interest to many caravanners. However, following a few explorative posts in social media, a few of you did express an interest, so I’m going to give an outline of what it is, what it does and why it might be useful.
Like the Wi-Fi booster system the kit is formed of two separately available  components – the first of which is the router. We’ll look at that first.
WP_20170511_10_14_34_ProWP_20170519_09_36_25_Pro
On the back there are four aerial connection points. Two are for receiving the mobile signal and indoor aerials are supplied or you can connect an external one if required. The other two are for transmitting the Wi-Fi signal to your devices. There are network ports to for devices that do not have Wi-Fi capability.
Behind the back panel are slots for two standard size SIM cards for the networks of your preference.
Set up was straightforward and I found that many of the default settings for your chosen network provider can be used. Like the WiFi system we looked at, you are urged to secure (and rename) the WiFi network that the device transmits.
There are a vast array of options for the more technically minded such as setting up an additional network – perhaps to share with friends. The use of the SIM cards can be configured in a number of ways – swapping from one to another if (when!) one network falls over or when a preset data limit is reached.
It is without doubt an exceptionally powerful and versatile device. See the link to the product on the Solwise website below:
As stated, the router can be used as a standalone device, but to get (and stay) connected in poor signal areas an external antenna is available. The antenna is omnidirectional so can be placed anywhere but height will help and a knowledge of where the mobile signal transmitter is will help in positioning the unit on the right side of the building and making the most of the available signal. Two five metre leads with connectors are included and both must be connected to enjoy the speed of 4G – more accurately called LTE.
WP_20170511_10_14_44_ProWP_20170519_09_37_10_Pro
The antenna wont just work with the above router though. Many mobile Wi-Fi adapters like those from Huawei have sockets for connecting an external antenna – often hidden behind a flap on the edge of the unit. With suitable adaptors this will work with such devices and may be a great solution if you rely on a mobile network to get connected but frequently come across poor signal strength. A variety of both temporary and permanent fixing options are included. This may be a solution for anyone that wants to get connected on their seasonal pitch or holiday home when Wi-Fi isn't available.
Check the link below for more details:


Product Review - Solwise WiFi Booster Kit

How you get connected when away camping broadly falls into two categories. One is using the mobile network - either with your 'phone's Wifi hotspot facility or a dedicated mobile Wi-Fi adaptor.

The other is on site or locally available Wi-Fi - and that's where our latest review product comes in.

WP_20170331_10_55_41_ProWP_20170331_10_55_52_Pro

There are two main components to the Solwise kit we are looking at, both of which play an important part in making this a very useful piece of kit.WP_20170331_13_03_34_Pro

WP_20170331_13_02_20_ProFirstly, the aerial. It sits outside your unit, so any available signal is not shielded by the walls, and is very powerful allowing you to pick up signals not normally reachable by a pad or laptop.

Secondly, the router box. This sits inside  and is connected to the aerial via a USB cable. The router creates it's own WiFi signal allowing multiple devices to connect to it, effectively sharing one connection. This is particularly useful for devices that don't have a normal USB connection or where you don't want to be tethered to a cable.

Right, getting it up! A  number of fitting options are provided in the kit including u-bolts for mouting to a TV aerial mast or similar, jubilee clips and suction pads for affixing to the side of your unit - and that's what we used. There is a waterproof seal at the bottom of the unit where the cable exits and provided theunit is mounted vertically, the supplied waterproof tape is not required.

Inside, there a couple of connections to make - the USB cable from the aerial to the router - and the router's power supply. Both mains and 12v adaptors are provided so you can stay online when off grid.

Comprehensive instructions are provided on how to set up the router through any web browser - and this can be done on any smartphone, laptop or pad with a WiFi facility - so pretty much anything!

Initial set up consists of these stages:

  1. Connecting to the router so you can access the router's set up screen - search as you would for any WiFi network.
  2. Access the router's set up screen through a browser
  3. Search for an available WiFi network and connect to it.
  4. Personalise and secure your own internal WiFi hotspot.

Now, that may all seem a bit of a faff. BUT, steps 1, 2 & 4 only need to be done once. When you go to another site you simply go through stage 3 again to find available networks and connect to one.

It sounds more involved than it is and if you've set up your home router you will have no problem with this.

So, you might be thinking, all very interesting but why bother? Again, there are two main reasons:

  1. The powerful aerial can pick up WiFi that your device may not be able to. Maybe you are at the far end of the campsite, or Wi-Fi is only available around the reception area for example. Or there may be no WiFi on site but you may be able to pick up some local WiFi with this - perhaps from a pub or BT WiFi - access to which is free if you are a BT customer.
  2. The router allows multiple devices to access one connection. Often site Wifi is limited to a single device either by a password or voucher system perhaps. Some even stop you logging out so you can't transfer usage to another device - we had this recently and it's a bit sneaky. In this case it would be your router that is connected. Your devices connect to the router. Imagine the potential cost saving for a family of four, all with devices to connect.

In the week or so that we've been using this we have found it invaluable. At our recent Twittercamp meet, five units were able to share one connection - one was even able to use a Now TV box thanks to the strength and stability of the signal. On our current site, my laptop struggles to pick up the site WiFi on it's own, but through the aerial and router it's fine - I've even been able to upload the video that will accompany this blog. It's very quickly become an essential part of our caravanning kit as bloggers and I wouldn't be without it now.

Thank you to Solwise for supplying the kit. We have put together a video to accompany the blog which you will find on our YouTube channel HERE

If you have any questions at all please do not hesitate to ask. If I can't answer them myself, I will try and get an answer for you or steer you in the right direction.

The kit is available direct or from Amazon HERE.

Kilrock - Moisture Trap and Mould Killer

Time - at last -  for another product review. I’ve been sitting on these for a while - not literally - because they arrived just before we departed on our Easter break up north - and since we’ve been back the overtime has been flooding in at work. Anyway, here goes.

We have two products here that the good folk at www.kilrock.co.uk sent for me to have a look at. The first is their Damp Clear Moisture Trap.

WP_20160318_13_53_52_ProNow, we may be fortunate but we don't have an issue with damp in the  caravan - not one that showed up in her annual service anyway. Yes, there’s always some condensation when it’s been really cold at night but nothing out of the ordinary. Our flat however is a different matter. WP_20160509_08_57_48_Pro


We’ve used moisture traps  for sometime now - particularly in the problem areas such as the bedroom and toilet - and the traps certainly collect plenty of moisture. I have a couple of different makes but the designs are largely the same. The crystals sit in a cover tray with a chamber to collect the water underneath.

The product from Kilrock is a little different. The profile of the unit is higher and the design means that more of the moisture attracting crystals are exposed to the air, making it more efficient. In a thoroughly unscientific experiment this certainly seemed to be the case - and this is what makes it better than it’s rival products. For comparison here are the units side by side, the Kilrock one is on the left:

WP_20160509_08_58_27_Pro

The retail price is £4.99 - and this includes a fill of the hydroscopic crystals which should last around three months. It’s available from the usual DIY stores as well as online at www.kilrock.co.uk and a quick search on the ‘net revealed this to be around the going rate for this type of product and is in line with what I paid for mine some years ago.

Next up is their Blast Away Mould.

WP_20160509_09_12_54_ProAgain, I have some experience of this type of product. There are a few specific locations in our flat that suffer from mould during the damper winter months, thanks in the main to ageing and ill fitting double glazing units. Once a month or so I use a spray on product around the problem areas - and in the main it is effective.WP_20160509_09_13_16_Pro

The product from Kilrock works in a similar way - you apply it, wait thirty minutes, wipe off and the mould is gone. The method of application here is different though and this is where it has some advantages. It is in gel form rather than liquid, so there is less chance of it running off to where you don’t want it. In addition it is applied with a brush, making it easier to target specific areas more effectively, rather than just spray and hope.

It was equally as effective in getting rid of the mould as my existing product - the strong smell of bleach was again present which would suggest that the ingredients are similar, but the method of application made for more precise targeting of the problem areas.

The retail price is £3.99 and is available as above - and again seems to be around the going rate.

So, a couple of really useful products from Kilrock that may be equally of use at home or when you are away in the caravan. If you are in the market for these types of products, check them out.